Project File Standards
So when you purchase and open project files you can expect a certain level of quality!
The idea here is that you can download a demo version of Ableton Live & all these project files will open perfectly so you can reverse engineer them, learn from them & use the tricks in your own productions!
Track Colouring & Grouping
Tracks in all project files will be coloured and grouped in the following ways across all project files distributed on the site.
- SC Input = Dark Grey
- Drum Group = Salmon
- Kicks & Other Low Percussion = Tomato
- Snares & Claps = Rust
- Hi-Hats & Cymbals = Peru
- Top-Kit & Grooves = Dark Olive
- Bass Group = Cream
- Subs = Emerald
- Other Basses = Evil Cyan
- Synths Group = Beige
- All Synth Channels = Turquoise
- FX Group = Dark Sea Green
- Risers & Impacts = Blue
- Random Glitches & Other Edits = Obsidian
- Vocals Group = Granpashes
- Vocals Channels = Amethyst
- Return Tracks = Grey
- Master channel = Glass
WTF are colors like “Evil Cyan” or “Peru” you may ask… Good question, here’s (figure 1) an outline of the colors named by Funi (funilab.com).
We did this in an attempt to be able to communicate Live’s color palette through conversation seeing as they never named them in the program.
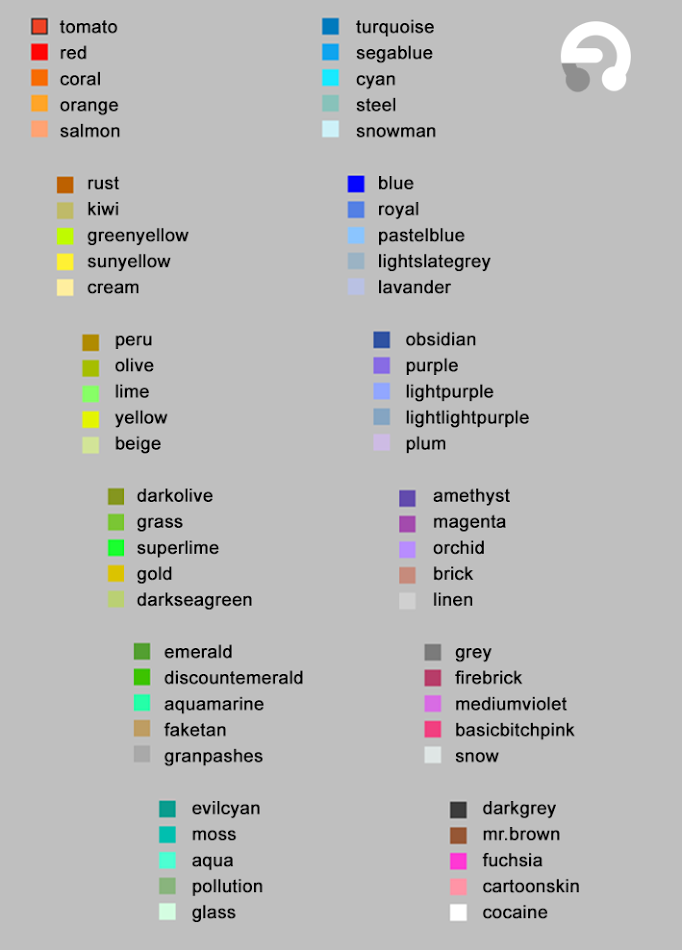
(figure 1)
Miscellaneous Processes
These are the other processes I’ve put my project files through to create the highest quality and most consistent standards. This also makes translating sessions from system to system possible for you.
- All tracks have been grouped, named & coloured.
- All clips on all tracks are coloured the same as their respective channels.
- All channels have been “thinned in session view” (meaning compacted to their smallest form) & all stop buttons have been removed.
- Arrangement markers have been created & named accurately in arrangement view.
- All channel inputs and outputs are routed correctly, and those without need for input are set to “No Input” (as this saves CPU power).
- Master & Cue levels are set to 0dB.
- All 3rd party plug-ins have been frozen (even if they have a side-chain compressor on them) – this is done by creating a new audio track (in this example, we’ll call it “Track 2”) below the track with the 3rd party plug-in on it (in this example, called “Track 1”), then routing Track 1 into Track 2, moving the sidechain compressor from Track 1 to Track 2, then freezing Track 1.
- The session has been saved in the following states:
- Project file is zoomed out
- The playhead is set to 1.1.1
- The loop brace is set to encompass the entire arrangement (but is turned off)
- The session has been collected & saved, so no samples will be missing from any project.
- All user generated sample folders are hidden in Live’s generated “Samples” folder to clean up the root folder of the project.
- The sessions will be named with the following formats (depending on the nature of the track – i.e. whether it’s a remix, a collab, an original, or how many stem processes it’s been through):
- Originals: Artist Name – Track Name Project
- Un-stemmed sessions that have a stemmed counterpart session: Artist Name – Track Name (Pre Stem Session) Project – if applicable
- Stemmed Sessions: Artist Name – Track Name (Post Stem Session) Project – if applicable
- Remixes: Artist Name – Track Name (Artist Name Remix) Project
- Collabs: Artist Name & Artist Name – Track Name Project
- All unused samples have been removed to create the smallest project-file possible.
Lessons
All project files will have lessons embedded, meaning when you open the project, you’ll be greeted with an array of session notes including which 3rd party plug-ins were used (if any – including links to where you can acquire these if you wish), as well as any other project file discrepancies you should be aware of!
My contact details are also embedded in the lesson so if you have any comments or questions, you can email me straight from clicking the link in the project file!
If they don’t – please let us know, we’re always trying to improve the site for you in any way possible 🙂
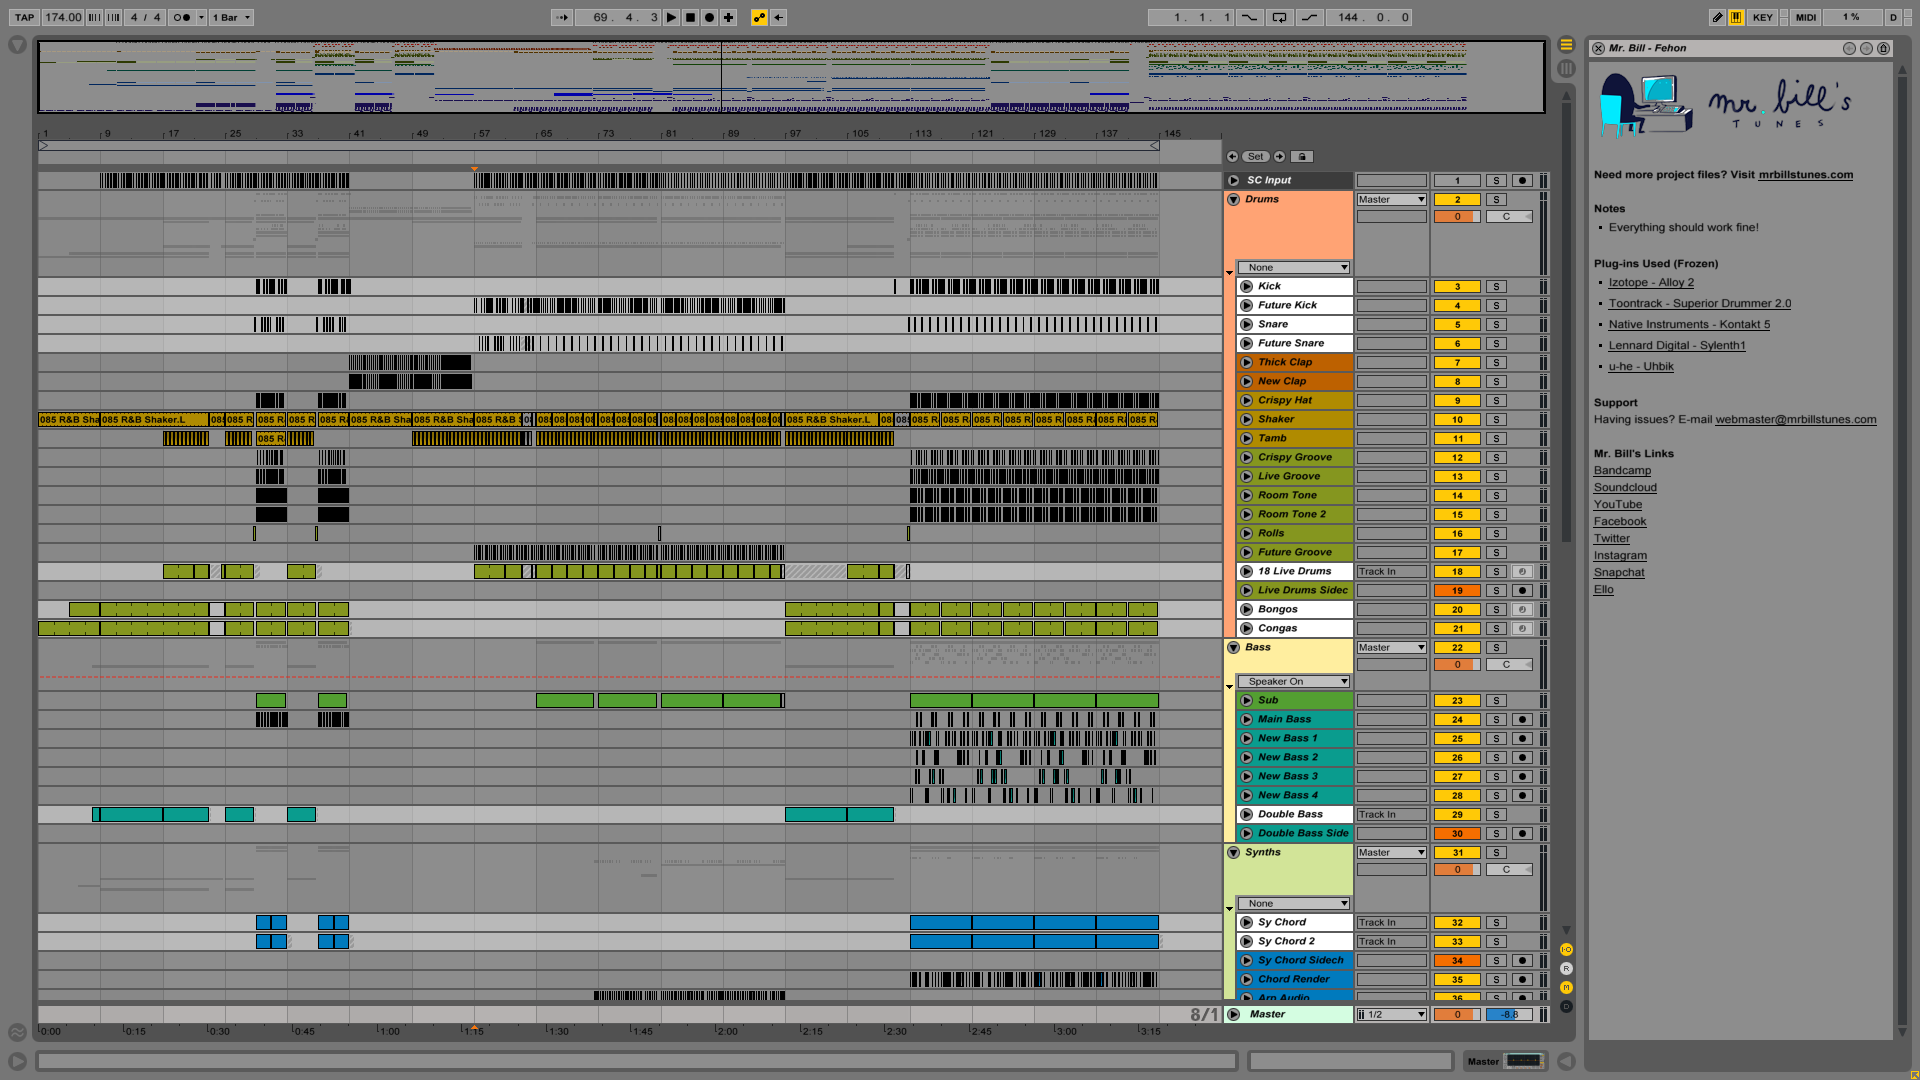
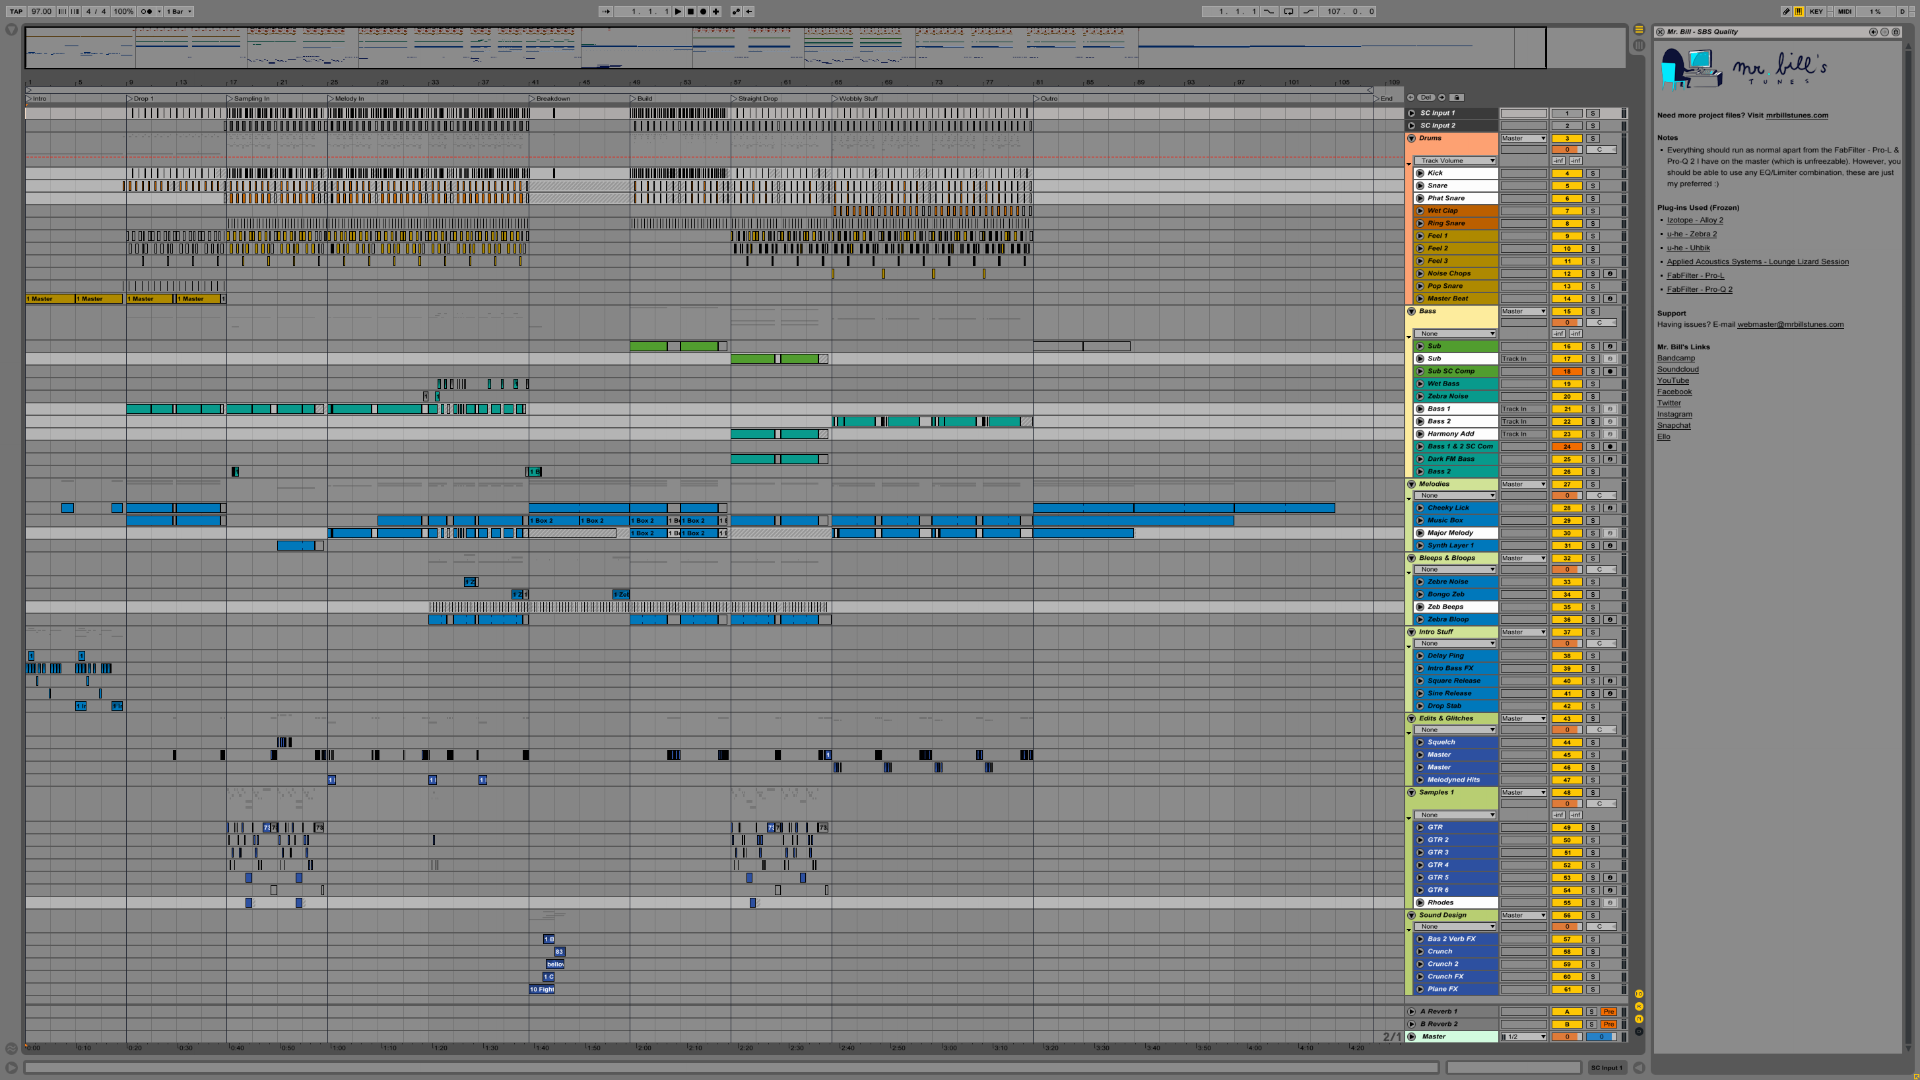
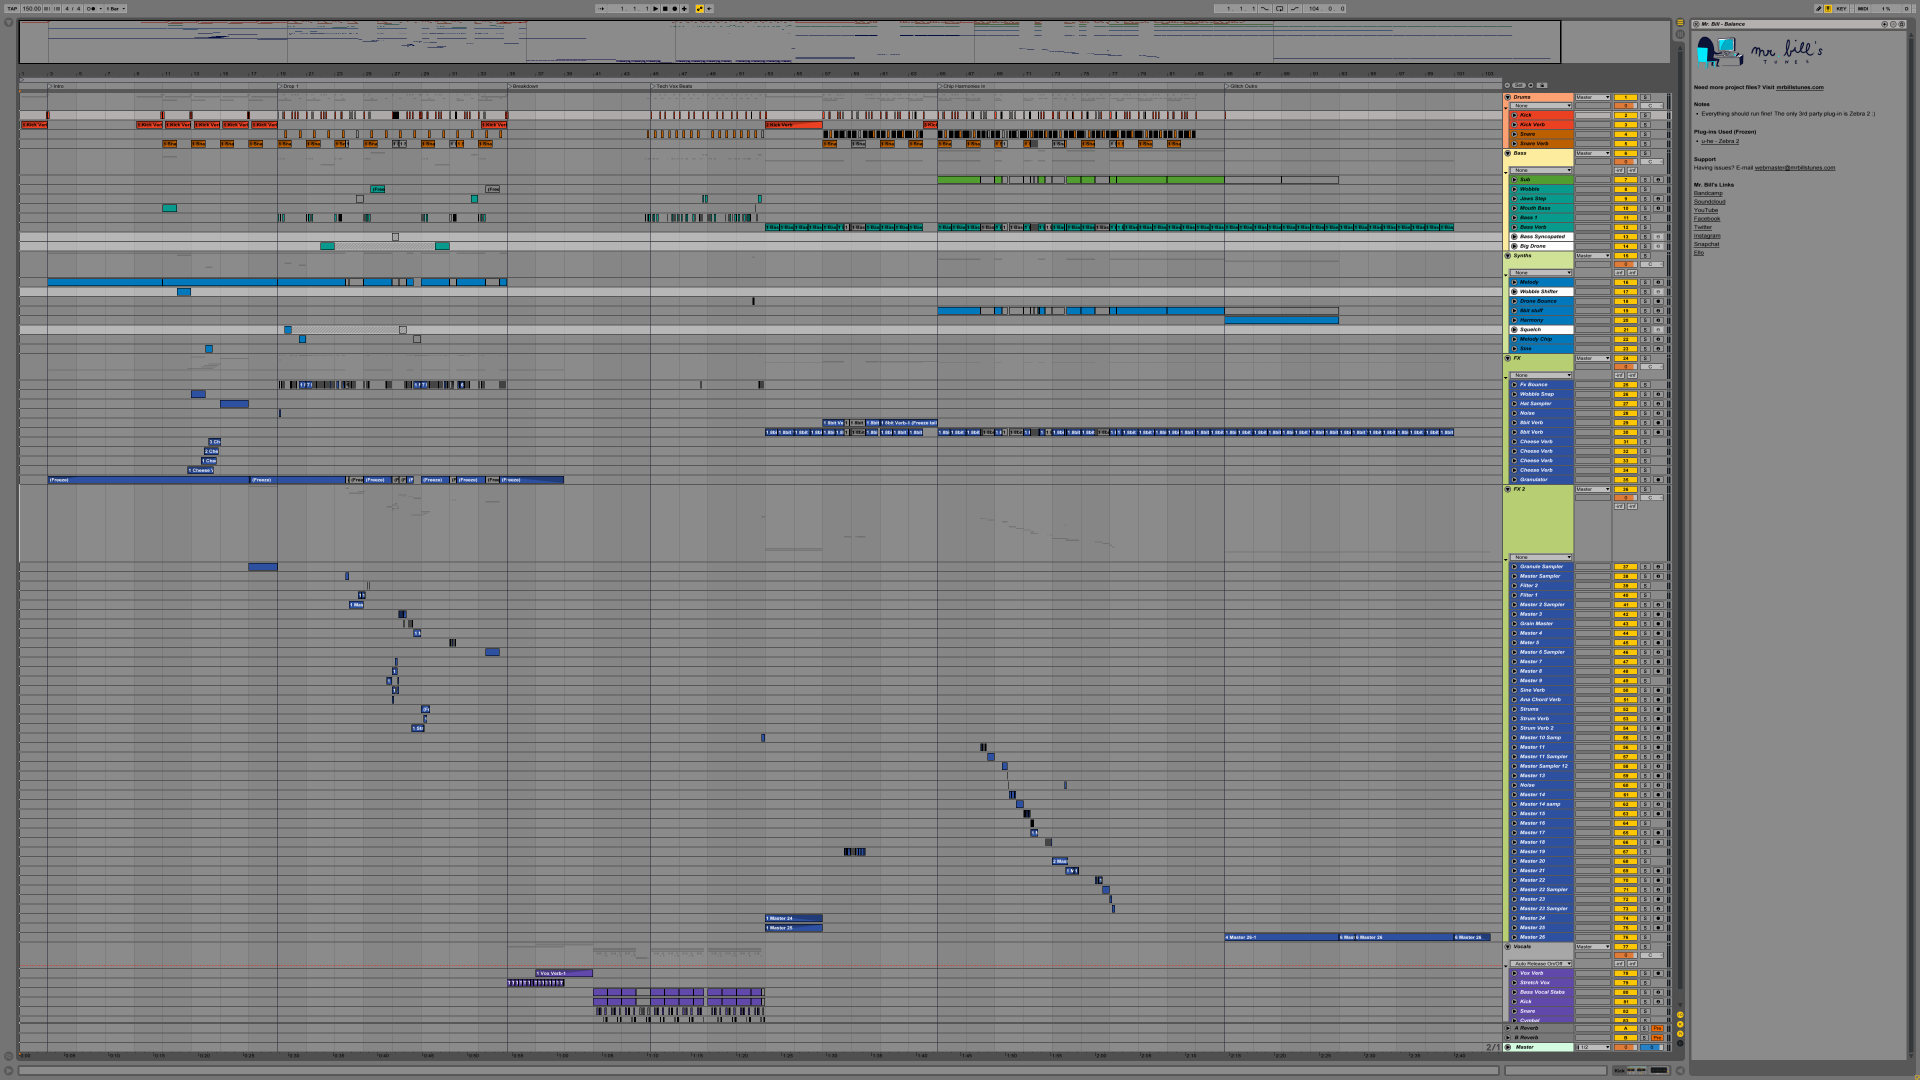
Screenshots from actual project files